
Hydraulic Breaker Leaking Oil: Causes and Safe Checks
Safely document a hydraulic breaker oil leak, trace the source zone, separate hose and internal evidence, and prepare a technician-ready report.
All buyer guides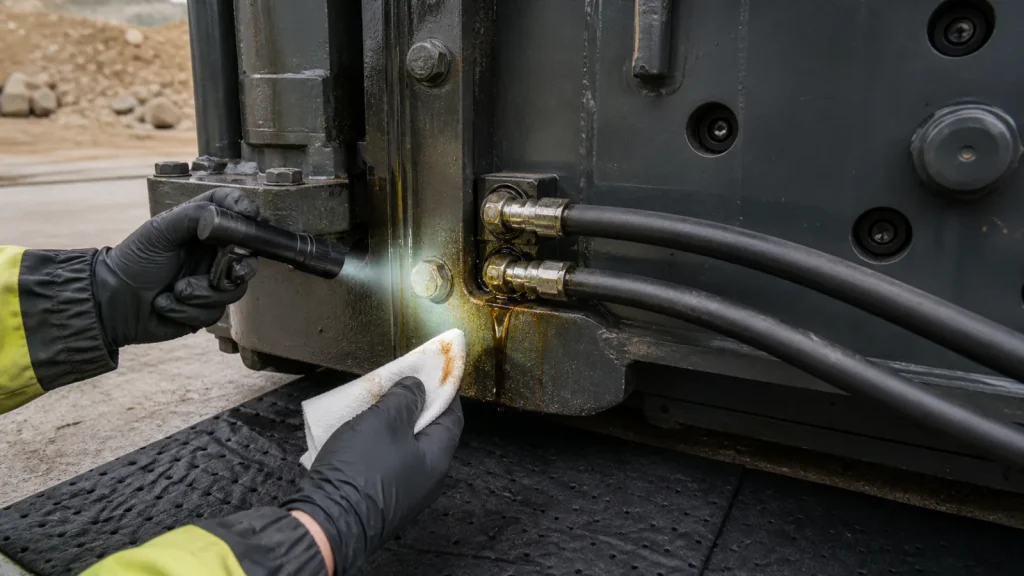
A hydraulic breaker oil leak needs a safe source check before anyone orders seals or tightens a fitting. Oil runs downward, spreads across dust and grease, and can make a hose or port leak appear to come from the front head. The first useful question is therefore: where does clean oil first reappear after the breaker has been safely shut down and the exterior has been cleaned?
This guide helps an owner or service coordinator document the symptom and choose the next qualified inspection. It does not teach pressurized leak testing or internal repair. Hydraulic injection injuries can be severe even when the skin mark looks small.
Stop-work rule: Stop operating when there is an active spray, rapid loss, damaged hose, unsafe oil level, hot oil exposure or uncertain pressure condition. Keep people away, lower and secure the attachment, shut down according to the carrier manual and contact trained service personnel. Never use a hand, finger or unprotected skin to find a hydraulic leak.
Hydraulic Breaker Oil Leak: Start With the Source Zone
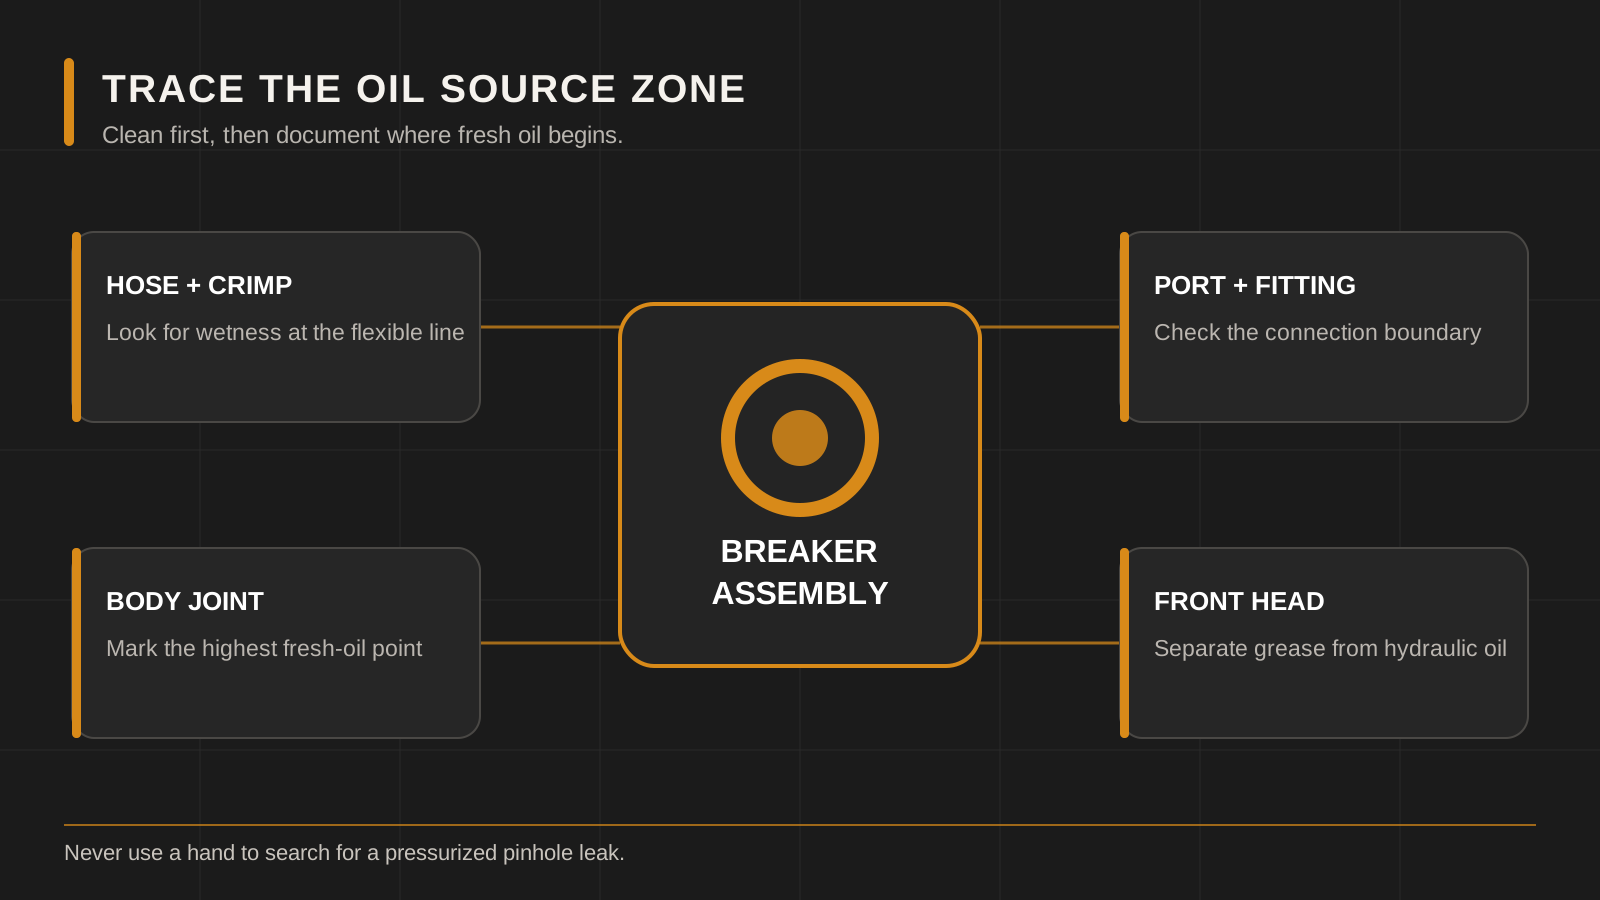
Divide the visible breaker into external zones rather than naming an internal part immediately. A technician can then connect the observation to the correct model drawing and approved test procedure.
- 1
Carrier hose and couplingHose cover, crimp, quick coupling, adapter and carrier-side line
- 2
Breaker inlet / return portFitting interface, port block and visible external seal area
- 3
Body joint or coverRecord the exact seam and whether oil begins above it
- 4
Front head / tool areaSeparate hydraulic oil evidence from normal or contaminated chisel paste
- 5
Carrier systemReservoir loss, warning, heat or another function changing at the same time
Oil, Grease or Mixed Contamination?
Breaker grease is normally present around the working tool and bushing area. It can be dark from dust and impact debris. Hydraulic oil is usually thinner and may travel farther, but appearance varies with product, temperature and contamination. Do not make a safety-critical decision from color alone.
Record the smell only from a safe distance and never taste or rub the fluid. Photograph the condition before cleaning, then let qualified personnel identify the fluid using service records and controlled inspection. If oil and chisel paste mix at the lower body, note both rather than calling everything a “front seal leak.”
Common External Leak Locations and Evidence
| Visible zone | Evidence to collect after safe shutdown | Qualified next step |
|---|---|---|
| Hose cover or crimp | Full hose route, damaged area, hose markings, length, both end fittings and carrier/breaker model. | Remove from service and have the hose assembly assessed or replaced to the approved specification. |
| Quick coupling | Coupling faces, lock condition, contamination, model/size markings and whether oil appears connected or disconnected. | Inspect the coupling and mating half; keep both sides capped and clean. |
| Port fitting / adapter | Highest wet point, fitting orientation, visible damage and evidence of movement. | Use the correct manual, fitting identification and torque procedure; do not tighten under pressure. |
| Body seam / cover | Exact seam, temperature state, operating symptom, model/serial and whether oil starts above the seam. | Technician inspection using the model drawing; internal pressure must be controlled first. |
| Front-head / tool area | Fluid type, tool position, grease condition, bushing movement, recent service and leak rate. | Separate lubrication contamination from a possible internal sealing or hard-part issue. |
| Carrier, not breaker | Reservoir level, warning messages, other wet components and whether other hydraulic functions changed. | Carrier dealer or qualified hydraulic technician checks the machine circuit. |
A Safe Observation Sequence
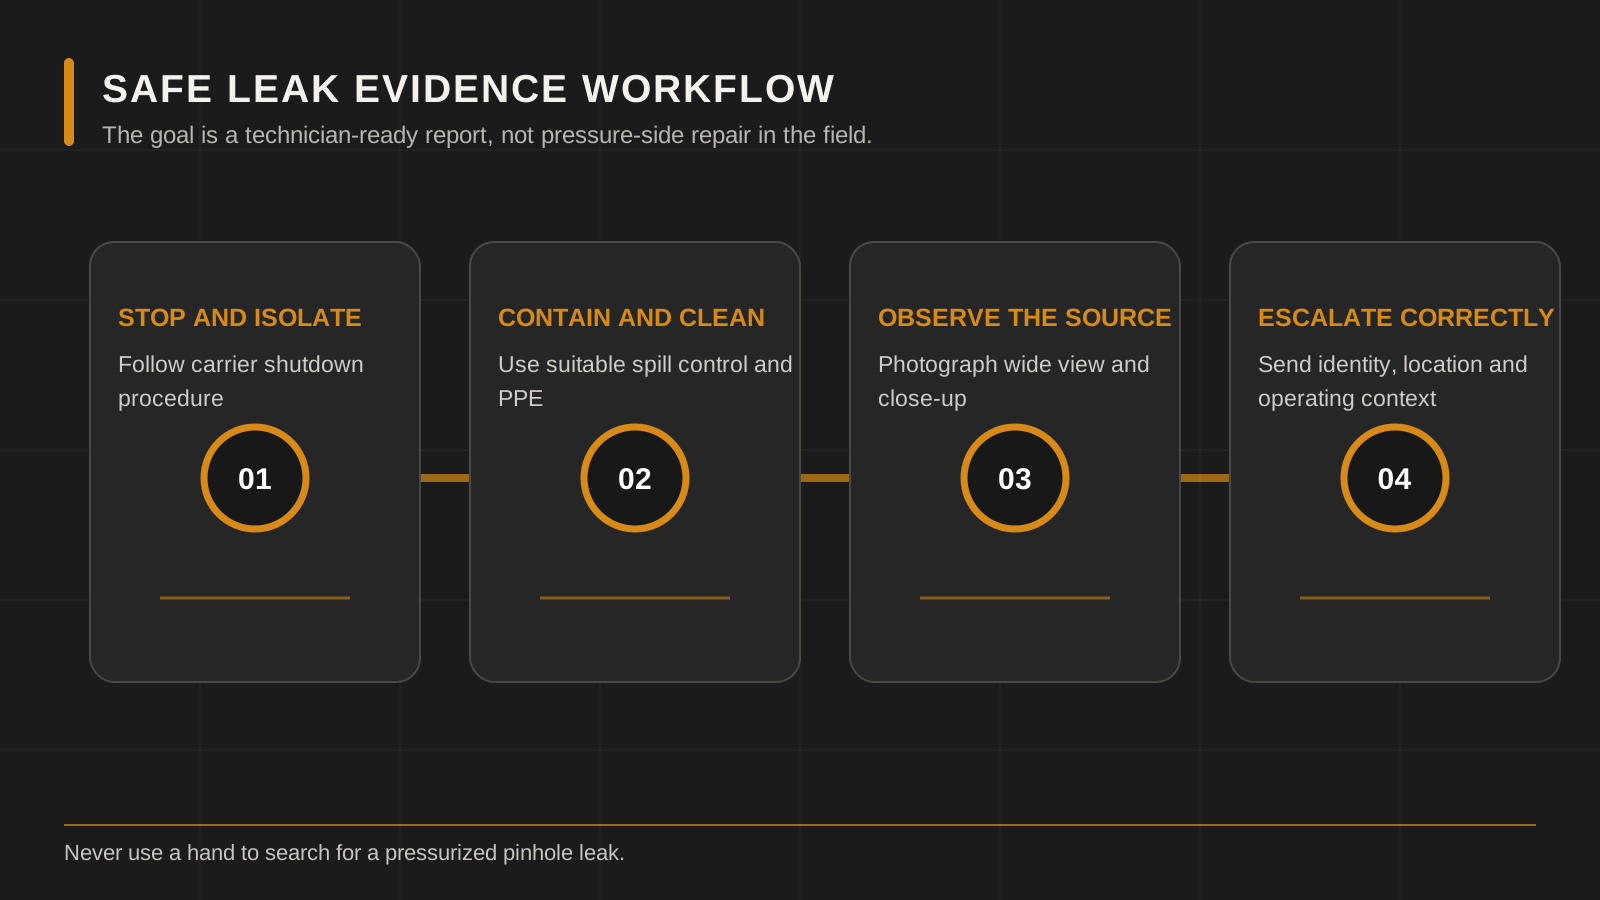
- Stop and isolate: follow carrier shutdown guidance, lower the attachment and keep people clear.
- Record before cleaning: photograph the complete breaker, ground spots and visible oil route.
- Check fluid-loss evidence: use the carrier’s approved level-check procedure; note warnings or overheating without restarting merely to “see the leak.”
- Clean only when safe: trained personnel clean the exterior using an approved method and collect contaminated material.
- Observe without contact: identify the highest fresh-oil point under the technician’s controlled process.
- Tag the source zone: mark the photograph, not the component, with an arrow and time.
- Escalate: send the evidence pack before parts are ordered or internal work begins.
Do not wrap a suspected pressure leak with a hand or use cardboard close to moving equipment. Leak-detection methods, PPE and pressure controls belong to the trained technician’s procedure.
Why a New Seal Kit May Not Be the Answer
A seal kit can be part of a confirmed repair, but leakage can also involve a hose, fitting, damaged sealing surface, scored piston or cylinder, incorrect assembly, contamination, heat or operation outside the breaker’s approved hydraulic conditions. Installing new seals without correcting the cause can repeat the failure.
If a workshop determines that internal seals are required, use the hydraulic breaker seal-kit guide to prepare model, serial, kit-content and service-scope evidence.
Leak Rate, Temperature and Timing
“Small” and “large” are hard to compare across messages. Use observable records: number and size of ground spots over a defined parked period, oil-level change measured by the carrier procedure, whether the leak appears cold or warm, and whether it occurs at rest or only during the approved technician test. Do not continue normal operation to collect more data from an unsafe leak.
Temperature matters because oil viscosity and component expansion change. A leak that appears only warm still needs inspection; it is not proof of a harmless condition. Record ambient temperature, warm-up state and any overheating warning.
Hose and Port Leaks That Look Internal
Oil from a breaker inlet or return connection can run behind a housing plate and emerge lower down. Photograph the upper connections first. Trace the wet route visually after shutdown, and include both hose ends in the evidence pack.
For replacement-hose identification, record hose markings, length, outside routing, fitting standard, angle, thread evidence and protective sleeve. Do not substitute a hose from appearance alone. The separate hydraulic breaker hose guide provides the ordering template.
Environmental and Housekeeping Controls
Hydraulic oil should not enter soil, drains or water. Use the site spill plan, suitable absorbent materials and approved waste containers. Collect contaminated cleaning water and grease. Replace improvised drip controls with a proper repair before the breaker returns to service.
Keep couplings and open hoses capped during service. Dirt introduced while investigating a leak can create a second problem in the breaker or carrier.
Leak Triage: Decide What Must Remain Out of Service
Any suspected high-pressure spray, mist, damaged hose, loose pressure component or rapidly increasing oil loss requires immediate isolation and qualified response. Keep people away from the suspected path and do not restart the carrier to create a more dramatic video. A small static stain can also hide a serious source if oil traveled from a pressurized connection before shutdown.
The service decision should consider the source, pressure exposure, component condition, oil loss, contamination risk, carrier impacts and the manufacturer’s acceptance criteria. Do not use a fixed “drops per minute” rule from another machine. Only the responsible technician can release the attachment after identifying the source and confirming that the repair and hydraulic condition meet the correct documentation.
| Triage question | Evidence to capture | Decision boundary |
|---|---|---|
| Could fluid be pressurized? | Mist/spray evidence, hose/fitting condition and when fluid appeared. | No hand inspection or live tightening. |
| Is the source confirmed? | Safely cleaned zones and first reappearance point. | The lowest drip point is not enough. |
| Was oil lost or contamination introduced? | Carrier level/warnings, ground spill and exposed ports/components. | Repair scope may include carrier fluid/filtration controls. |
| Can the attachment return to work? | Technician repair record and controlled leak/function check. | No release based only on a dry exterior after wiping. |
What to Verify After an Oil-Leak Repair
Keep the original source photographs and compare them with the completed work. The repair record should identify the failed interface, parts replaced, relevant procedure, oil/contamination action and technician. During the controlled test, observe from a safe position through the specified temperature and operating condition; do not search with hands or material held near a moving attachment.
After shutdown and isolation, inspect the same source zone plus surfaces below it. Record whether the area remains dry, whether hoses move correctly and whether carrier warnings or oil-level changes remain. If oil returns, stop and reopen the diagnosis rather than tightening or adding seals repeatedly.
Information to Send a Technician or Supplier
Hydraulic breaker oil-leak report
Date, location and operator: ___
Breaker brand / model / serial: ___
Carrier model: ___
Oil or fluid type if confirmed: ___
Highest fresh-oil point: ___
Leak observed: cold / warm / parked / controlled technician test
Ground spots or level change: ___
Warnings, heat or impact change: ___
Recent hose, fitting or internal service: ___
Photos/video: complete breaker / upper connections / source close-up / nameplate
Breaker isolated from service: yes / no
Requested support: diagnosis evidence review / hose identification / seal-kit review / technician service.
Common Mistakes
Tightening the wet fitting immediately
The fitting may be pressurized, incorrectly identified or damaged. Control pressure and use the correct fitting and torque procedure.
Running the breaker to reproduce a spray
A high-pressure jet is an injury risk. A technician should choose the controlled test method.
Replacing seals from a generic kit
Seal content and dimensions vary by model and revision. Match the drawing and inspect mating parts.
Cleaning away all evidence
Photograph the route before cleaning and the first reappearance point afterward. Keep the time sequence clear.
Ignoring the carrier
The leak or hydraulic symptom may originate on the machine. Include carrier warnings, reservoir evidence and other-function behavior.
Frequently Asked Questions
Is a small hydraulic breaker oil leak safe to operate?
Leak size alone is not enough to declare it safe. Stop, isolate and have the source and pressure condition assessed under the approved procedure.
Why is oil appearing near the chisel?
It may have traveled from above, mixed with grease or originated from an internal lower-body condition. Record the highest fresh-oil point and let a technician diagnose it.
Can I find a hydraulic leak with my hand?
No. Pressurized oil can penetrate skin. Keep hands and face away and use a trained, controlled inspection method.
Does leaking oil always mean the piston seals failed?
No. Hoses, couplings, fittings, covers, hard parts and carrier-system conditions can also be involved.
What photos are most useful?
Send the complete breaker, nameplate, upper hose connections, highest fresh-oil point and the full route to the drip location.
Manufacturer Reference Used for This Guide
The official NPK hydraulic hammer operator manual provides manufacturer-specific hose, connection and inspection requirements. Use the manual for the actual breaker; this linked example supports safe evidence gathering but does not supply LICHI repair values.
Request a Leak Evidence Review
Use LICHI contact to send the completed report. Start with the broad hydraulic breaker troubleshooting guide if there are additional symptoms such as weak impact, unusual sound or overheating. For part names, use the parts diagram and ordering-data guide.
Any diagnosis, compatibility, repair scope, parts availability, price and lead time must be confirmed in writing for the exact breaker and carrier.
Keep Comparing
Compare more breaker models and buyer guides related to this topic.


