
Hydraulic Breaker Accumulator and Diaphragm Guide
Identify a hydraulic breaker accumulator, diaphragm or repair kit safely, document the assembly and route pressure work to exact model data.
All buyer guides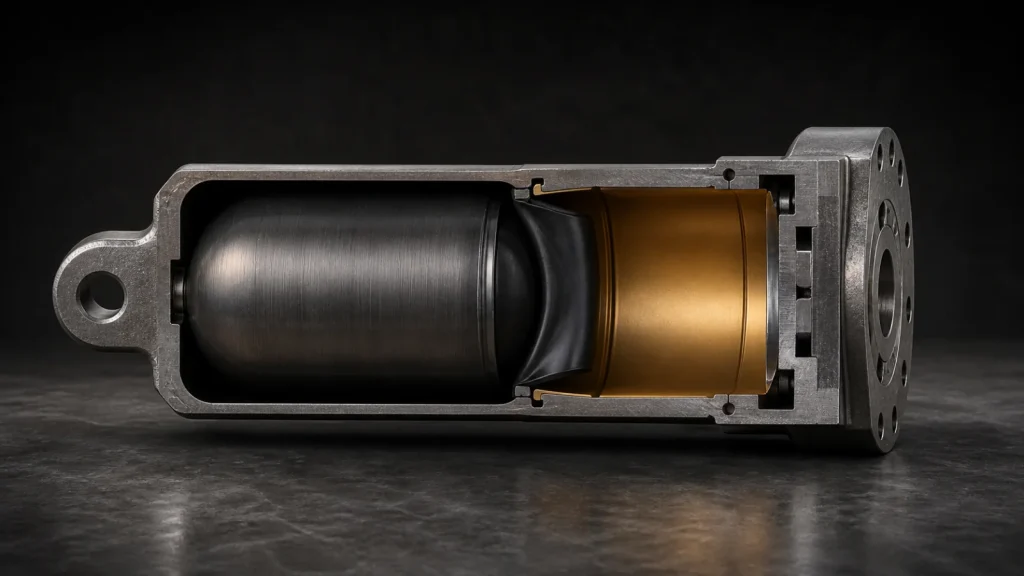
A hydraulic breaker accumulator stores energy in a gas-separated chamber and supports the breaker’s hydraulic cycle in designs that use one. The diaphragm is the flexible separating element in many bladder/diaphragm-style assemblies. These parts are model-specific pressure components: their presence, construction, charge medium, service kit and approved charge value cannot be inferred from breaker size alone.
This guide helps owners and parts teams distinguish an accumulator assembly from its diaphragm or repair kit, collect identification evidence and prepare a safe service inquiry. It intentionally gives no charging pressure, gas-filling sequence, disassembly steps or torque values. Use the exact manufacturer manual and trained service personnel for all pressure work.
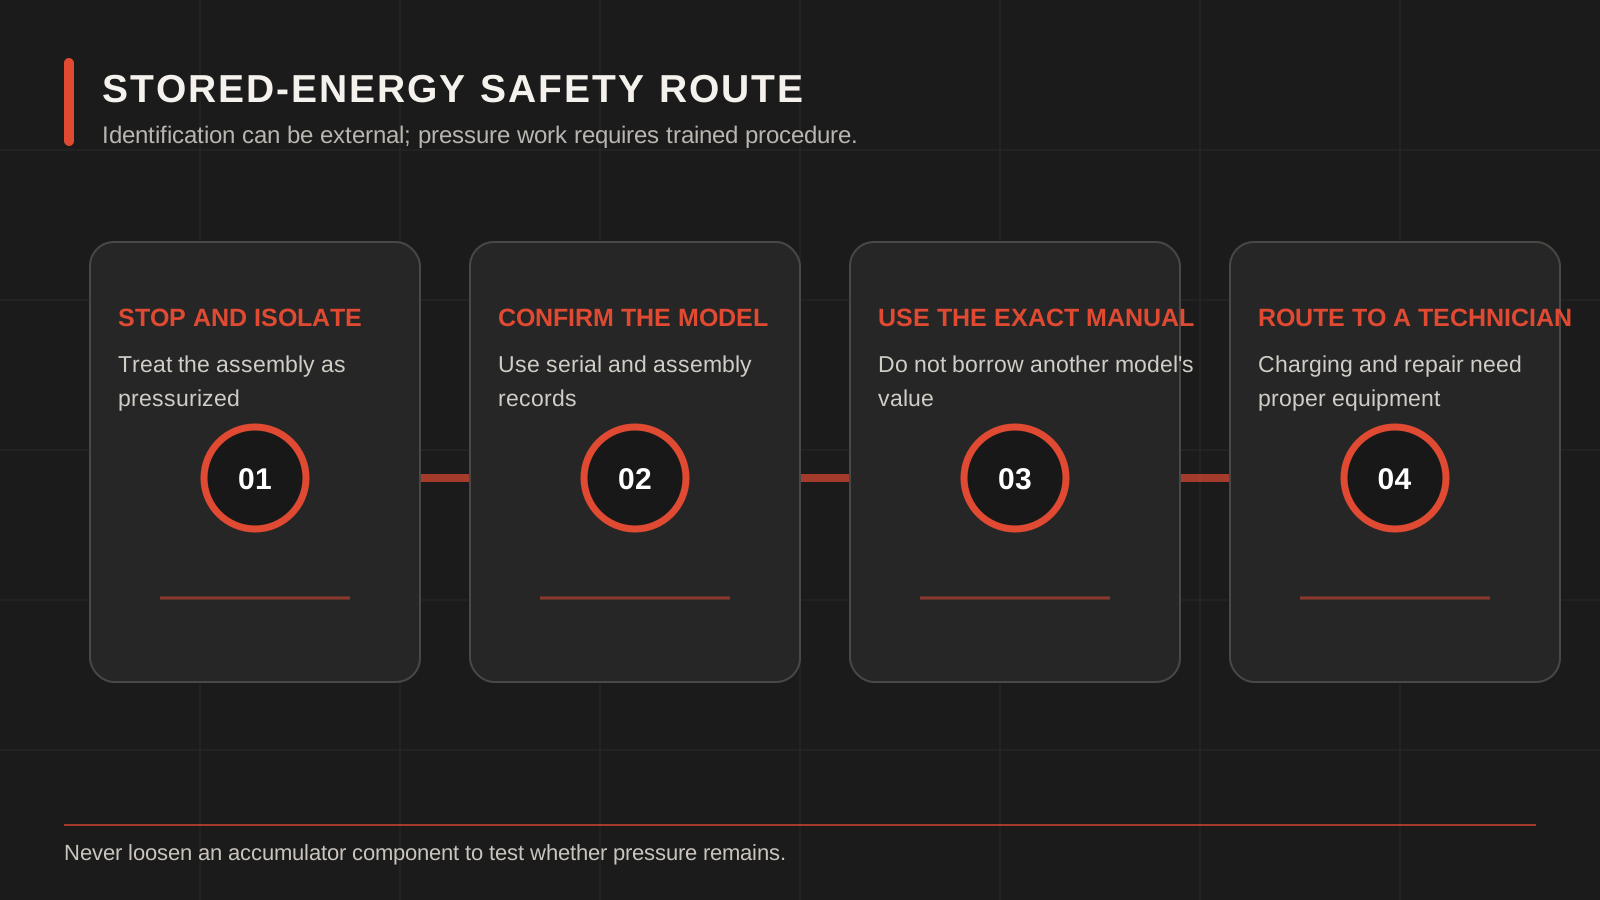
Stored-energy warning: An accumulator or breaker back head can remain pressurized after the carrier is shut down. Never loosen a plug, valve, hose, cover or fastener to “see whether pressure remains.” Isolate the equipment and have qualified personnel verify and release pressure with the approved model-specific equipment and procedure.
Accumulator, Diaphragm and Back Head Are Different Terms
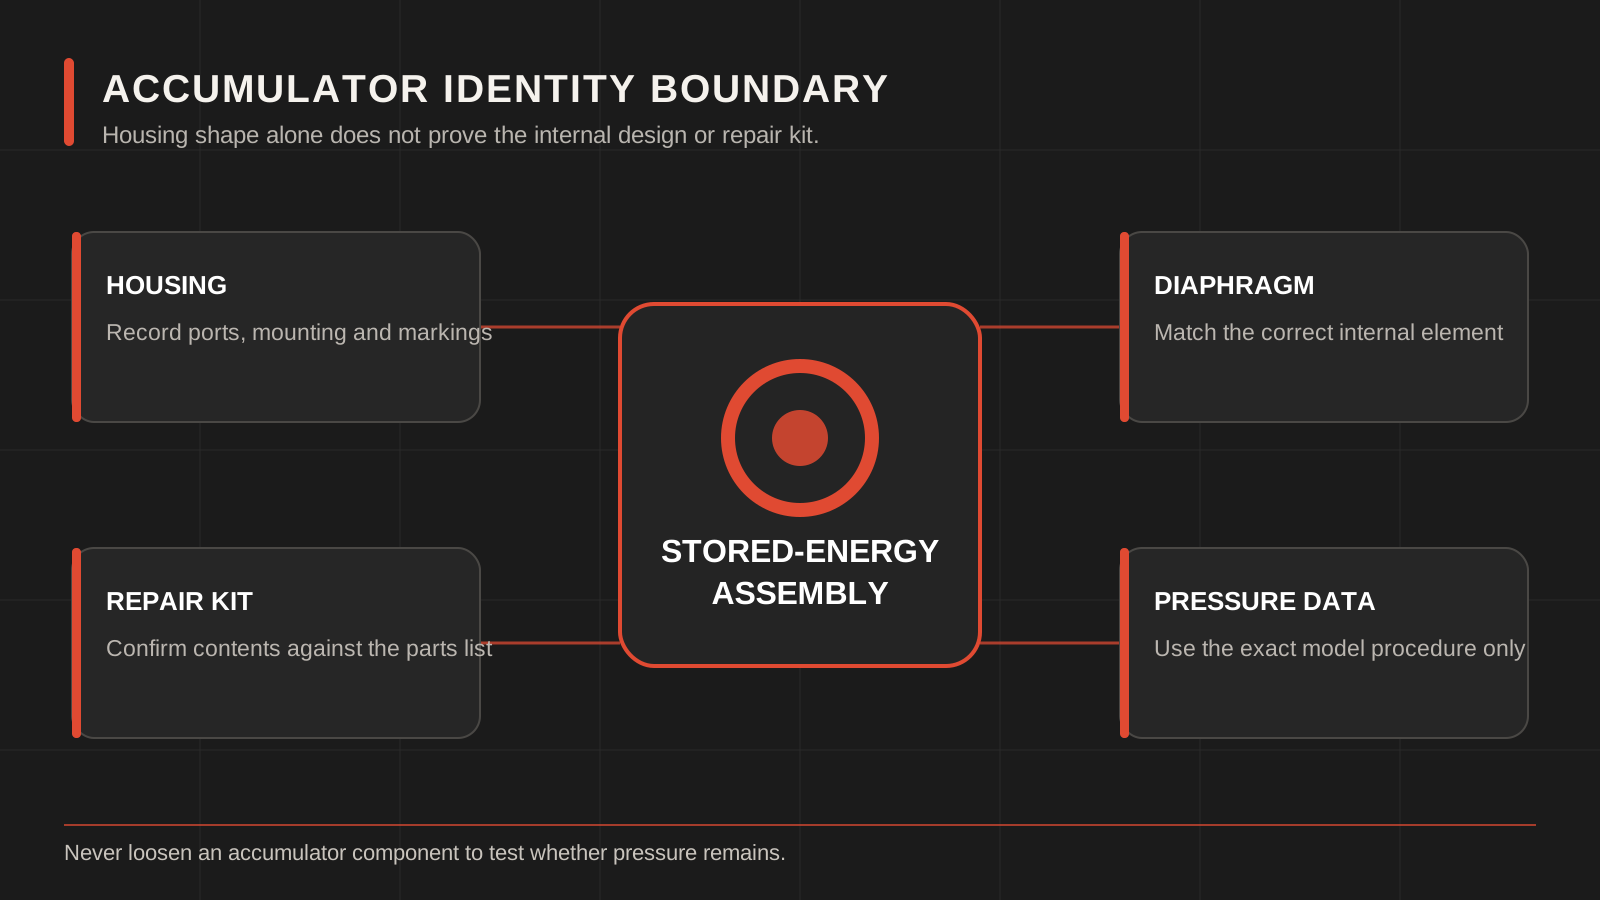
Parts conversations often combine several components under the word “nitrogen.” That creates ordering mistakes. An accumulator is an external or integrated pressure vessel used in the hydraulic circuit on certain breaker designs. A diaphragm is one possible internal separator between gas and hydraulic fluid. A repair kit may contain the diaphragm plus selected seals, supports or valve items. The back head is a different breaker section and may contain a gas chamber on some designs.
Not every hydraulic breaker has the same arrangement. Do not assume that a breaker with a charged back head also uses the accumulator shown in another brand’s diagram. Start with the exact parts book and the physical assembly on the machine.
- 1
Confirm breaker designFull model, serial/revision and manufacturer parts diagram
- 2
Mark the assemblyAccumulator, back head, charge valve or another component
- 3
Identify the service itemComplete assembly, diaphragm, seal kit, valve or inspection only
- 4
Use approved pressure dataExact manual, temperature condition, gas and service equipment
- 5
Record the workTechnician, instrument, readings, parts and leak/function checks
What the Accumulator Does in a Breaker System
In a breaker designed with an accumulator, the gas-separated volume can absorb or release energy as hydraulic pressure changes during operation. Depending on the design, this can support pressure stability, the impact cycle or protection from pulsation. The accumulator works with the valve, piston, cylinder and carrier circuit; it is not a stand-alone “power booster” that can be adjusted freely.
A charge outside the approved condition can change performance and increase risk. Temperature, breaker position, service state and measurement method may affect the specified check. The separate hydraulic breaker nitrogen pressure guide explains how to locate the correct value without inventing a universal number.
What Is a Hydraulic Breaker Diaphragm?
A diaphragm is a flexible component designed to separate gas from hydraulic fluid inside a compatible accumulator assembly. Its geometry, material specification, support pieces and sealing interfaces are chosen for that assembly. Similar-looking diaphragms may not have the same dimensions, pressure capability or service life.
Some suppliers call a package an “accumulator repair kit” or “membrane kit.” The package may include a diaphragm, O-rings, backup rings, valve seals or supports, but the name does not establish contents. Epiroc’s official parts information, for example, presents diaphragm and accumulator repair kits as specific service parts. Use that as evidence for the model-specific principle, not as proof that an Epiroc item fits another breaker.
Symptoms That Justify Inspection, Not Guessing
A breaker with weak, irregular or changing impact may have an accumulator-related issue, but the same symptom can arise from carrier flow/pressure, return restriction, gas condition elsewhere, oil temperature, valve or seal leakage, tool loading or operating technique. An external oil leak near the accumulator may originate from a port, fitting, hose or assembly seal. A symptom only tells the service team where to begin evidence gathering.
| Observation | Useful evidence | Unsafe or weak conclusion |
|---|---|---|
| Impact changed | Cold/warm condition, carrier mode, material, tool loading and timing of the change. | “Add more gas” without diagnosis. |
| External oil trace | Safely cleaned exterior and first reappearance point, photographed from wide and close views. | Opening the charged assembly to find the source. |
| Charge does not hold | Qualified test record, approved instrument, valve/leak findings and service history. | Assuming the diaphragm is the only possible leak path. |
| Recent repair | Parts used, manual revision, technician, charge condition and post-service test. | Changing pressure repeatedly until the sound seems right. |
| Unknown component | Full breaker, nameplate, assembly markings, port layout and parts drawing. | Ordering by color or accumulator outside diameter. |
Safe Information to Collect Before Service
- Breaker identity: brand, complete model, serial/revision, tool diameter and body type.
- Accumulator identity: label, stamped number, valve position, port arrangement and full assembly photographs.
- Parts-book evidence: drawing page, assembly number, diaphragm/kit item and document revision.
- Complaint history: what changed, when it occurs, whether it followed a hose, seal or charge service, and whether leakage is present.
- Service records: last approved charge check, replaced items, technician and test result. Do not publish sensitive machine or customer data.
- Carrier context: model, circuit configuration and any verified hydraulic measurements performed under the approved procedure.
Do not remove a protective cap, gauge port or gas valve merely to improve a photograph. Exterior marks are enough for the first inquiry. The service provider can then specify the controlled next step.
Why Charge Pressure Cannot Be Copied From Another Breaker
The approved value depends on the specific design and service condition. Different documents may specify a check at a stated breaker position, oil temperature, ambient temperature or gas-side condition. Gauges and charge equipment also need suitable range, condition and connection. A number without these conditions is incomplete.
Use only the current manufacturer document for the serial/revision or written technical confirmation from the responsible supplier. Record the source next to the value on the job sheet. If the manual is unavailable, pause the pressure task and request it; do not substitute a forum post, product listing or value from a visually similar unit.
Diaphragm and Repair-Kit Ordering Data
A diaphragm inquiry should connect the breaker to the accumulator assembly and the kit. Start with the breaker nameplate, then record the accumulator part number and its visible markings. Mark the requested item on the parts drawing. If the assembly has already been opened by qualified personnel, photograph the diaphragm and every companion part separately with their original locations labeled.
Dimensions may help when original identification is incomplete, but the supplier should specify which measurements are required. Flexible parts can deform after service or removal, so an unsupported free-state diameter is not a reliable fitment key. Never stretch, cut or reinstall a diaphragm simply to compare it with a catalog image.
Reviewing an Accumulator or Diaphragm Quotation
| Quotation field | What should be explicit | Why it matters |
|---|---|---|
| Breaker application | Full model and serial/revision or documented substitute evidence. | Accumulator arrangements can vary within a size class. |
| Assembly identity | Accumulator or back-head assembly number and drawing reference. | Prevents two pressure chambers being confused. |
| Supply scope | Complete accumulator, diaphragm, repair kit, seals or valve listed separately. | “Complete kit” is not a standardized contents list. |
| Fitment status | Confirmed or pending named photos, dimensions or serial data. | Unresolved fitment must not be hidden. |
| Service boundary | Charging/service data is supplied through the correct manual or technician route. | A parts sale does not authorize an unsafe generic procedure. |
| Commercial status | Quantity, availability, lead time, packing, destination and terms in writing. | Catalog presence is not live inventory proof. |
Common Accumulator and Diaphragm Mistakes
- Calling every gas-filled area an accumulator and ordering the wrong repair kit.
- Using a pressure value from a different model, temperature condition or service state.
- Checking pressure by loosening a valve or fitting instead of using the approved equipment.
- Replacing a diaphragm without inspecting the valve, sealing surfaces and contamination evidence.
- Assuming “nitrogen kit” includes the gauge, adapter, valve and every seal needed for the exact breaker.
- Judging diaphragm material or compatibility from color and flexibility.
- Returning the breaker to work without a documented leak and function check.
Post-Service Record for a Pressure Component
A controlled record should name the breaker and accumulator, list every part replaced, cite the manual/procedure, identify the technician and equipment, document the specified test conditions, and record the final leak/function inspection. It should also state unresolved findings and the next inspection point.
Keep the record with the machine rather than relying on a handwritten value on a dusty cap. The next service team needs to know what was actually measured and under which condition. Do not post serial numbers or customer-specific service data publicly without permission.
If the assembly is removed from service, cap hydraulic interfaces and label its pressure status according to the workshop procedure. Store replaced diaphragms or seals only when the investigation requires them, in a clean labeled container that preserves location evidence. Never ship a potentially charged assembly without the responsible dangerous-goods and carrier review.
Copy-and-Send Accumulator or Diaphragm Request
Hydraulic breaker accumulator / diaphragm inquiry
Breaker brand / full model / serial: ___
Requested component: accumulator / diaphragm / repair kit / valve / uncertain
Accumulator or assembly markings: ___
Parts-book drawing and item: ___
Symptom and when it occurs: ___
External leak location: ___
Previous pressure-component service: ___
Photos attached: full breaker / nameplate / whole assembly / label / ports / drawing
Quantity and destination: ___
Please confirm: assembly identity / kit contents / fitment basis / exclusions / availability.
Frequently Asked Questions
Does every hydraulic breaker use an accumulator?
No. Breaker designs and terminology vary. Confirm the assembly in the exact parts book instead of assuming from size or housing type.
Is the diaphragm included in a seal kit?
Not necessarily. It may be sold in a separate accumulator repair kit or as its own item. Ask for an explicit contents list.
What nitrogen pressure should I use?
Use only the value and conditions in the current manual for the exact breaker/assembly. This page deliberately does not publish a universal number.
Can low impact confirm a failed diaphragm?
No. It is one possible area among several hydraulic, gas, valve, seal, tool and operating causes. A controlled diagnosis is required.
Can LICHI match an accumulator from a photograph?
A photograph can narrow identification, but written fitment confirmation requires breaker identity, assembly markings, drawing evidence and any requested dimensions.
Manufacturer Reference Used for This Guide
Bobcat’s official breaker rebuild-kit listing separates a seal kit from a package that also includes a diaphragm and pressure-regulator item, while requiring model/serial compatibility. It illustrates scope control only; it does not prove cross-brand fitment or provide a charging procedure.
Request a Model-Specific Pressure-Component Review
Send the complete identity pack and service history through LICHI contact. Use the spare-parts support hub for the commercial workflow and the seal-kit guide when the service scope includes other sealing assemblies. Final fitment, charge specification, kit contents, availability, price, packing and lead time require written confirmation.
Keep Comparing
Compare more breaker models and buyer guides related to this topic.


