
How to Use a Hydraulic Breaker: Operator Guide
Use a hydraulic breaker through a controlled inspect, position, load, break and reposition cycle while avoiding blank firing and side loading.
All buyer guides
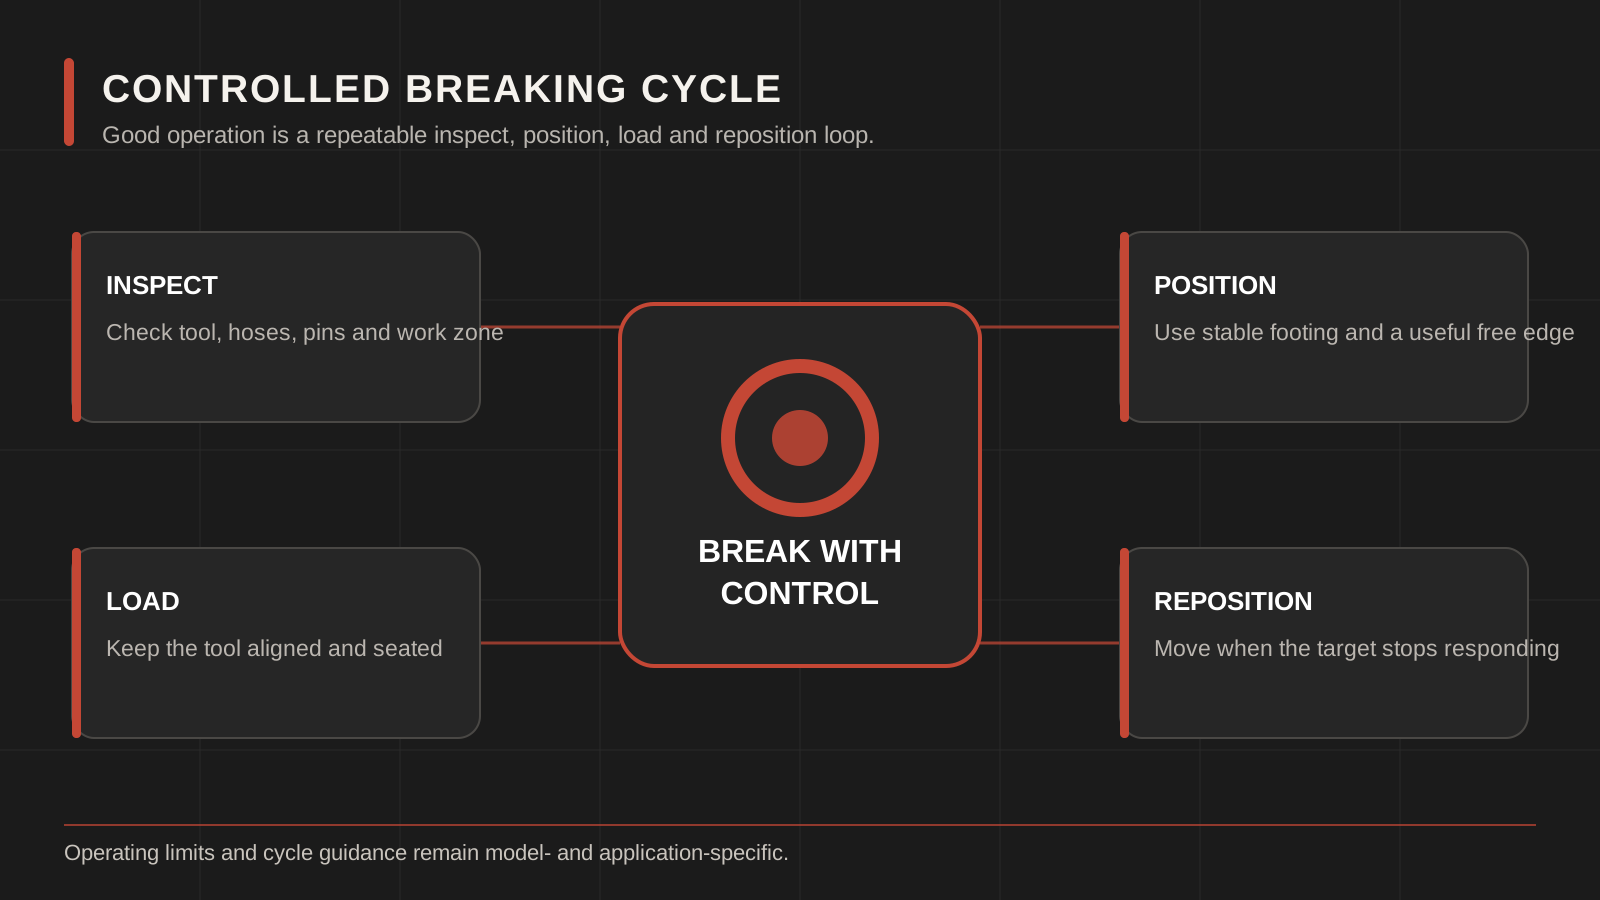
To use a hydraulic breaker well, repeat a clear decision cycle: inspect, position, load the tool correctly, apply impact, stop when the material or contact changes, then reposition. The operator’s goal is controlled breaking without blank firing, prying, uncontrolled side loading, overheating or damage to the carrier and attachment.
This guide explains how to use a hydraulic breaker through an observable pre-use, work and post-use routine. It does not replace formal operator training or the manuals for the exact carrier, breaker, coupler and tool. It deliberately gives no universal impact duration, engine speed, flow, pressure, grease interval or service limit.
Operating boundary: Only trained and authorized operators should use the attachment. Establish the work zone, verify underground/overhead hazards, use the required protective structure and PPE, and follow carrier/breaker limits. Stop immediately for people entering the exclusion zone, unstable material, leakage, loose retention, warning indicators or abnormal sound/movement.
The Hydraulic Breaker Operating Cycle
- 1
InspectMachine, attachment, tool, retainers, hoses, leaks and work zone
- 2
PositionStable carrier, controlled reach and tool approximately square to the target
- 3
LoadMaintain tool contact using the approved carrier force—not excessive lift
- 4
Break and observeWatch penetration, sound, movement, hoses, warnings and material response
- 5
Stop and repositionRelease impact before contact is lost or the tool is used as a lever
Pre-Use Inspection Before Every Shift
Walk around the carrier and breaker with the attachment safely supported. Use the inspection points and acceptance limits in both manuals. Do not begin work if any safety device, guard, coupler confirmation or required record is missing.
- Attachment lock and bracket: confirm coupler/retention indicators, pins, locks and visible structural condition.
- Breaker body: look for loose or shifted housing parts, damaged fasteners, cracks and abnormal gaps.
- Tool and retainers: inspect for cracking, deformation, loss, abnormal wear and the manual-defined guide/bushing condition.
- Lubrication: follow the exact lubrication method and interval; inspect the visible grease condition and autolube supply if equipped.
- Hoses and connections: inspect the complete route for leaks, abrasion, exposed reinforcement, kink, twist, tension and contact.
- Carrier: check fluid levels/warnings, attachment mode and any manufacturer-required guards or protective structures.
- Work area: locate utilities, edges, overhead hazards, people, traffic, falling/flying material and unstable structures.
If the breaker was newly installed, confirm the commissioning and handover record from the hydraulic breaker installation guide. Do not treat a successfully attached coupler as proof that hydraulic settings were verified.
Position the Carrier and Tool for Controlled Contact
Place the carrier on stable ground within its operating limitations. Avoid using excessive reach or an unstable edge position merely to avoid moving the machine. The boom, stick and attachment should provide controlled downforce and visibility without lifting the carrier unnecessarily or placing cylinders at damaging end positions.
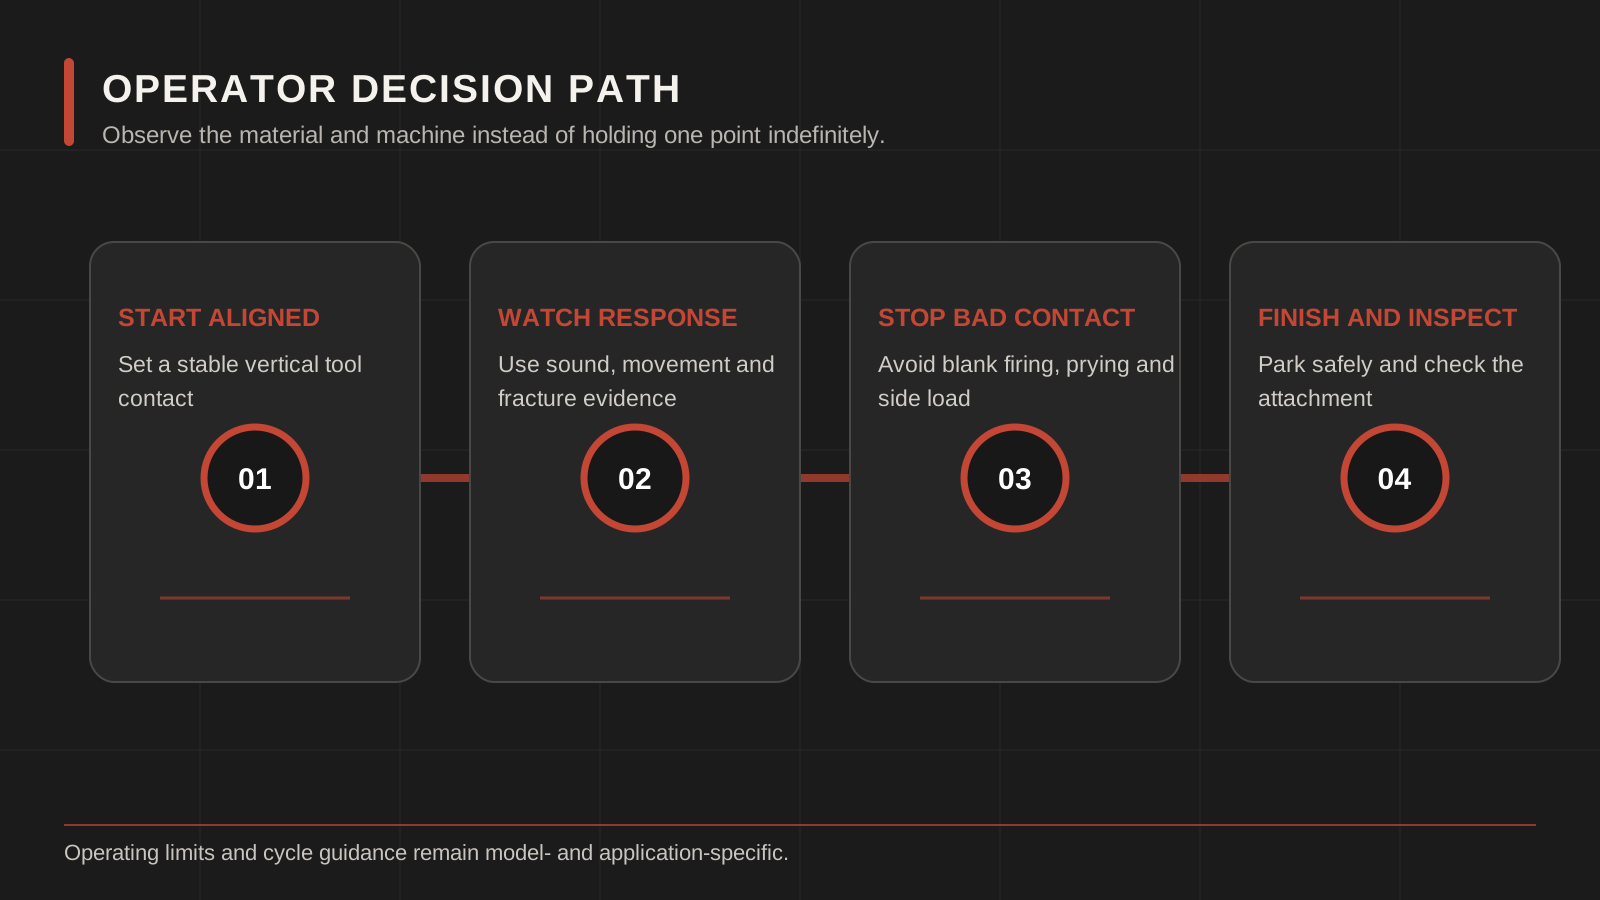
Position the tool approximately perpendicular to the material surface unless the exact application and manual specify otherwise. The operator should be able to maintain alignment as the material fractures and the tool penetrates. If the breaker or tool begins to slide, release impact and reset.
Apply Tool Load Before Impact
The tool needs positive contact so impact energy transfers into the material. Apply the manufacturer’s recommended carrier force, but do not use the breaker as a jack to lift the machine excessively. Too little contact can permit blank firing; excessive force can destabilize the carrier, overload the tool/guide interface or prevent the operator from following material movement.
Watch the breaker position rather than only listening to impact sound. As material breaks away, the tool can lose contact suddenly. Release the breaker control before allowing repeated unloaded blows.
Break From an Edge or Free Face When Practical
Material generally releases more predictably when impact can create or extend a free face. Start at an accessible edge and work inward in controlled increments where the work plan permits. Attacking the center of a large unrelieved mass can waste energy and encourage the operator to hold impact too long in one spot.
For reinforced concrete, quarry rock, trenching or oversize reduction, the sequence and hazards differ. Review the site method, material behavior and required tool type. The concrete demolition guide and hard-rock breaker guide cover those application-specific decisions.
Know When to Stop Impact and Reposition
There is no responsible universal “seconds per spot” value for every breaker and material. Use the model manual and job method, while watching observable results. Reposition when the tool is no longer penetrating, contact is unstable, the target moves into an unsafe state, the breaker angle changes, abnormal sound/movement appears or a carrier warning occurs.
| Observation | Operator response | Reason |
|---|---|---|
| Material fractures or tool drops | Release impact, regain visual control and reposition. | Prevents unloaded blows and uncontrolled penetration. |
| No useful penetration/progress | Stop within the manual/job limit; choose a new point or create a free face. | Continuous impact can create heat and wear without productive breaking. |
| Tool starts sliding or breaker leans | Release impact and restore alignment/contact. | Reduces side loading and loss of control. |
| Hose pulls, rubs or moves abnormally | Stop and safely inspect the route. | Movement may precede abrasion, fitting damage or hose failure. |
| Leak, warning, unusual sound or loose part | Stop, isolate and report; do not restart for diagnosis by sound. | Limits escalation and preserves evidence. |
Avoid Blank Firing
Blank firing occurs when the breaker cycles without effective tool contact against the material. It can happen when the target breaks before the operator releases control, when downforce is insufficient or when the tool is not correctly positioned. The energy that should enter the material is instead managed inside the attachment, increasing harmful loads.
Prevention depends on observation and timely release, not a sound-based trick. Keep the tool loaded, watch material movement and stop as soon as the break is complete. If blank firing repeats, review operator visibility, positioning, control response and application method.
Never Use the Breaker Tool as a Pry Bar
A breaker tool is designed primarily to transfer impact along its axis. Levering, pulling or sweeping fractured material with the embedded tool applies side loads to the tool, bushings, retainers and front head. Use the carrier bucket or the correct handling attachment to move material instead.
If the tool becomes stuck, stop impact and follow the approved release method. Do not swing the carrier, bend the tool or repeatedly strike while pulling sideways. Secure the area if material movement is unpredictable.
Manage Heat, Dust and Changing Conditions
Ambient temperature, oil temperature, continuous duty, dust and altitude can affect the carrier and breaker. Follow warm-up, cooling, filtration and duty guidance in the exact manuals. Do not pour water onto a hot breaker or change relief/flow settings in response to heat without diagnosis.
Dust and fine abrasive material increase attention to tool-area cleaning and lubrication. In wet or underwater work, special equipment and procedures may be required; do not submerge a standard setup unless the manufacturer has approved and configured it. Stop when visibility or ground stability no longer supports controlled operation.
Lubrication During Operation
Correct lubrication protects the tool and guide interface. The interval and application method depend on the breaker, autolube/manual system, working condition and manufacturer instructions. Apply the specified product at the specified position and condition. The hydraulic breaker grease guide explains how to assess records and visible evidence without publishing one interval for all machines.
More grease is not a substitute for inspection. If grease is contaminated, escapes from a new location, fails to reach the tool interface or consumption changes sharply, stop and investigate the lubrication system, bushings and seals.
Post-Use Shutdown and Inspection
- Move to the designated safe area and follow the carrier/breaker shutdown procedure.
- Lower and support the attachment in the approved position; isolate controls.
- Inspect for fresh oil, damaged hoses, loose parts, tool/retainer changes and abnormal grease paths.
- Remove accumulated material using the approved method without directing debris into seals or ports.
- Record operating hours, lubrication, observed faults and any stop event.
- Tag the attachment out if a defect remains unresolved. Do not leave the next operator to rediscover it.
Operator Record That Helps Maintenance
A short consistent record is more useful than “breaker okay.” Note carrier and breaker identity, shift hours, material/application, tool used, lubrication event, visible hose/tool/bushing condition, warnings, leakage and unusual behavior. For a fault, add a wide video showing tool position and a close photograph only after safe shutdown.
When performance changes, state whether the breaker was cold or warm, whether the change was sudden or gradual, and what action stopped it. That information helps the technician separate operating condition from hydraulic or internal causes.
Common Hydraulic Breaker Operating Mistakes
- Beginning impact before completing the attachment and work-zone inspection.
- Operating at excessive reach instead of repositioning the carrier.
- Holding impact after the material breaks and allowing blank firing.
- Using the tool to pry, sweep, lift or drag material.
- Continuing in one unproductive point instead of creating a new free face.
- Ignoring hose movement, oil leaks, loose retention or carrier warnings.
- Copying another machine’s attachment settings or maintenance interval.
- Finishing the shift without logging a developing defect.
Copy-and-Use Operator Briefing
Hydraulic breaker shift briefing
Carrier / breaker / tool identity: ___
Approved attachment profile: ___
Work area, material and exclusion zone: ___
Utilities / edge / overhead / falling-material controls: ___
Manual-specific inspection and lubrication points: ___
Correct tool contact and breaking sequence: ___
Stop conditions and defect contact: ___
Post-use parking and record location: ___
Operator / supervisor / date: ___
Frequently Asked Questions
How long should I hammer in one spot?
Use the exact breaker manual and site method. Stop sooner when there is no useful progress, contact changes, the tool slides or another stop condition appears; no one duration fits every material and model.
Should the excavator lift while the breaker works?
Apply only the manufacturer-recommended tool load. Excessively lifting or destabilizing the carrier is not a safe substitute for correct contact.
Can I use the chisel to move broken rock?
Do not pry, sweep or pull with the breaker tool. Use equipment intended for material handling.
Why does the breaker stop after warming?
Several carrier, hydraulic, gas, valve, seal and operating causes are possible. Record the conditions, stop safely and use the troubleshooting process rather than changing settings blindly.
What is the correct grease interval?
It depends on the exact breaker, lubrication system and duty. Follow its manual and adjust only through the approved maintenance process.
Manufacturer Reference Used for This Guide
Caterpillar’s official excavator hammer operating tips support daily inspection, prompt repositioning, blank-firing control and avoiding prying. The operator must still follow the exact carrier and breaker manuals, because this page publishes no universal time or setting.
Get Model-Specific Operating Support
For the correct breaker manual, tool, maintenance plan or fault evidence review, send the breaker/carrier identity through LICHI contact. Use the troubleshooting hub for abnormal operation and the spare-parts support page for model-matched service items. Final operating limits, settings and service decisions remain controlled by the exact equipment documentation.
Keep Comparing
Compare more breaker models and buyer guides related to this topic.


